
If you are going to try and capture the solar eclipse with an equatorial mount, you are probably concerned about how you are going to do the polar alignment (unless you are lucky enough to be able to set up the previous night).
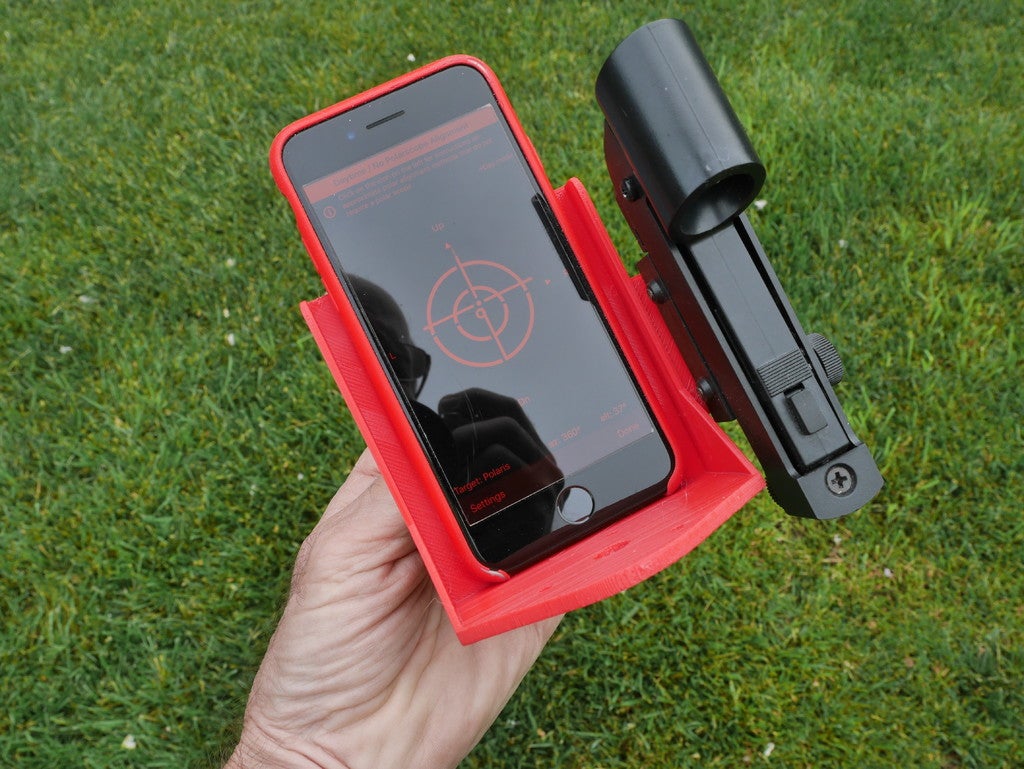
Sky & Telescope seems to have popularized a method which uses a planetarium-type app in your smartphone in order to see where your polar scope points. The setup for an equatorial mount looks a bit like this:
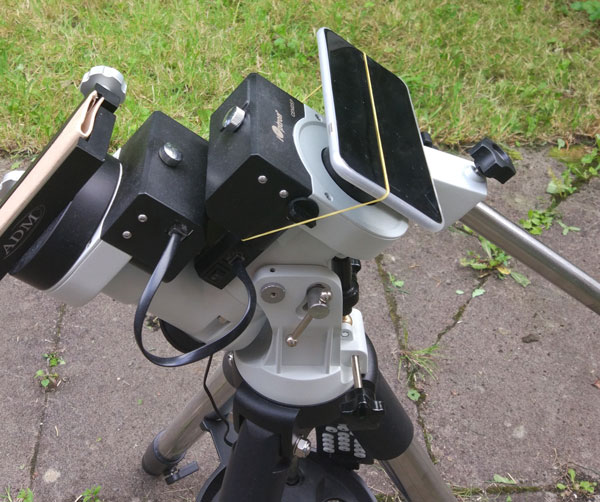
There is some slight problem with this setup… IT DOESN’T ACTUALLY WORK! At least not as described…
I don’t know what kind of magical phone Sky & Telescope used, however when I approach a metallic object with any of my phones, the magnetometer goes wild. In the above image (similar setup to the popular article) it was off by 5-10 degrees. If I put it flat on a metal surface like the images I saw with a wedge mount, it would probably go much more. So, to use this method you have to take your phone away from anything metal. Something like that though, would probably be easier with a different method altogether… Enter the latest tool I made for my Polar Scope Align Pro app:
Daytime / no polar scope alignment with Polar Scope Align Pro 3.4
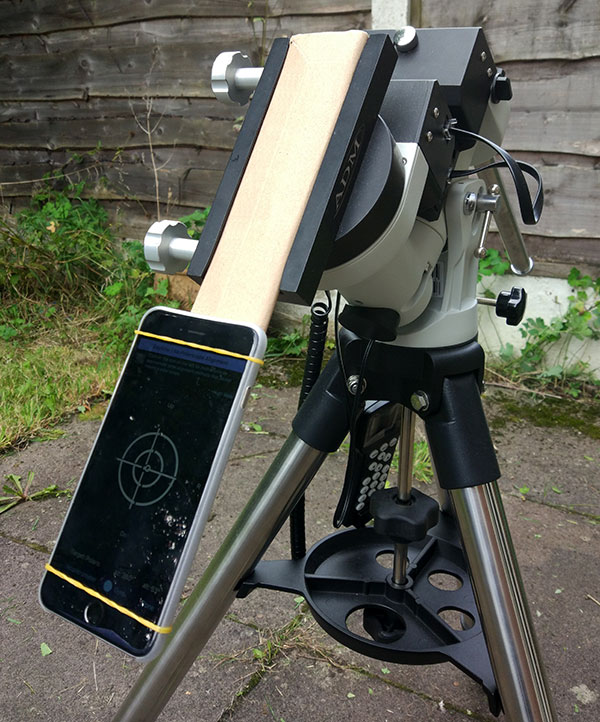
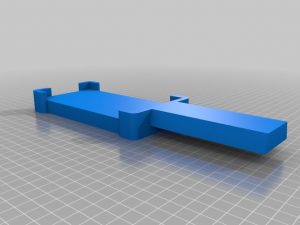
The idea is that you strap the phone either on the saddle (or even the OTA) while your mount is at zero position (declination at +90 degrees – scope/saddle parallel to the RA axis), and have the top of the phone point to the celestial pole. The trick is that there is a very simple way of mounting without any magnetic interference, by using something like a long piece of plastic or wood as a dovetail, and strap the phone away from the saddle. Here is an example with my first test using just cardboard:
And here is a much more polished construction for an iPad by Michel Moreau:
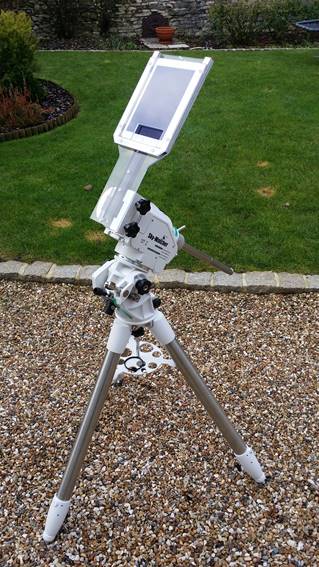

He kindly shared his plans (descriptions in French) which you can download here.
Update: iPhone X users can now download a 3D-printable design from Thingiverse.
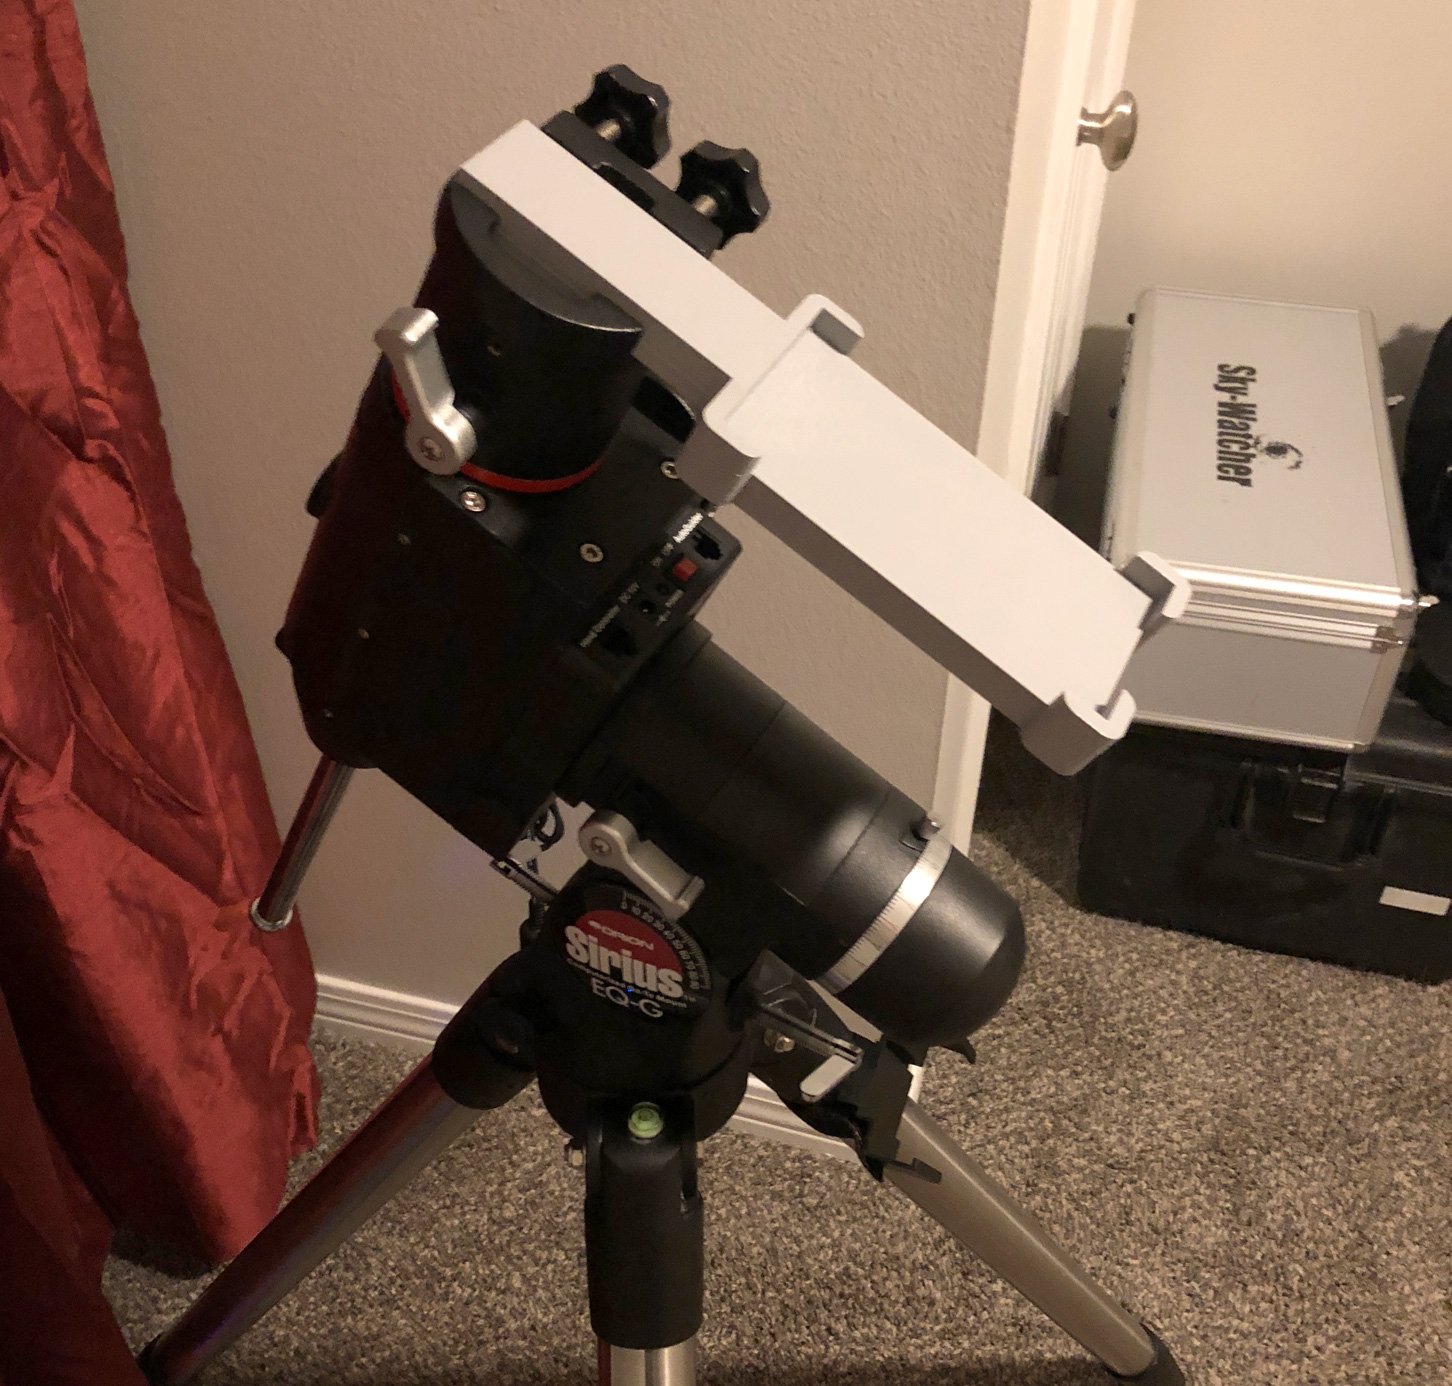
And another option again from Thingverse:
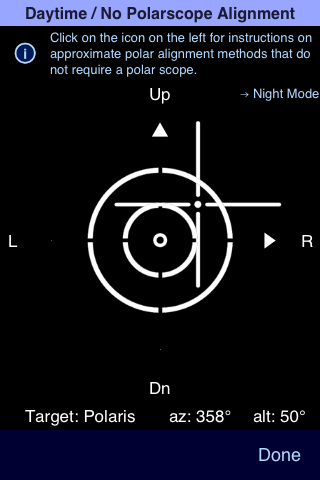
From there, Polar Scope Align’s new tool shows you the corrections you have to make using the alt-az control knobs:
The proof-of-concept cardboard dovetail gave an alignment within 2 degrees, while a proper rigid dovetail made of wood can get you within a degree. Not bad!
A good physical compass with a sight is probably even better though, so for completion sake here are the 4 methods described in Polar Scope Align’s Daytime alignment help:
Method 1: Using PS Align Pro’s Daytime alignment tool.
The quickest method with the best results that does not require any special equipment uses Polar Scope Align Pro’s daytime alignment tool. There is a caveat though. The method requires that you strap your phone to either the saddle or the telescope tube (if the tube is a straight cylinder). If you have something like a carbon-fiber OTA, you are set, otherwise the tube or saddle will be metallic and getting the phone close to it will affect the magnetometer readings, often by over 5-10 degrees! To see the effect just keep an eye of your phone compass reading while slowly bringing the phone close to the metal surface and you will notice a shift. To avoid this effect that will make your magnetometer useless, I find that using something plastic, (rigid) cardboard or wooden in place of a long dovetail and strapping your phone on it, away from the saddle, is an easy solution. See the image above with my first (cardboard) prototype. With a setup like that, you can follow the following steps:
STEP 1: Set your mount to zero position (declination +90°) which will give you a saddle/OTA exactly parallel to the RA axis.
STEP 2: Set Polar Scope Align Pro to “Auto” location and start the daytime alignment tool (Sun icon).
STEP 3: Follow the on-screen instructions. Arrows will be showing you the up/down and left/right adjustment you have to do using the altitude and azimuth controls of your equatorial mount (NOT RA/declination). When you are close, the celestial pole will appear as a target to help you guide it to the center of the screen. For reference, the outer of the targetting circles has a radius of 4 degrees.
Method 2: Using a physical compass (and polar scope).
The smartphone compasses in general are not known for their great precision, even if you avoid the aforementioned interference. If you have a decent physical compass with something like a sighting hairline that can give you a bearing on the horizon, you can get a more accurate alignment (which, as an exception, will actually require a polar scope – so only for daytime use, not when you don’t have a vew of the North):
STEP 1: Set up your mount pointing roughly to the North.
STEP 2: Set Polar Scope Align Pro to “Auto” location and open the Bubble Level / Compass tool. Get the magnetic declination reading shown on the right of the display (drown vertically, with data provided by stephentrainor’s ObjectiveWMM).
STEP 3: Applying the magnetic declination for your location as an offset, find the true north with the compass and with the hairline sight see where a North (or South for the S. hemishpere) bearing line that crosses your RA axis and hits the horizon / a distant object.
STEP 4: Lower your altitude so that the polar scope points near the horizon and using the alt/azimuth adjustment knobs find the point in the horizon that you noted as marking the true north.
STEP 5: Use either the Polar Scope Align’s Bubble Level or Daytime alignment tools (“alt:” reading) to adjust the inclination of your mount to match your latitude, using tha altitude adjustment bolts (similar to method 1).
Method 3: Using a planetarium app.
This is a quick method popularized mainly by Sky & Telescope, in which you set your phone perpendicular to the polar scope, which means on the flat surface of the wedge, or, similar to the image at the top of the article for an equatorial mount.
The problem with this method is that IT DOESN’T ACTUALLY WORK as described. In the above setup, which is quite similar to what the original article that popularized the method showed, my magnetometer is off by about 10 degrees. If I set it flat on a metal wedge, I bet it would be off even more! So, if you want to use it, you’d better figure out a way to avoid magnetic interference.
STEP 1: Load a planetarium app to your phone (Polar Scope Align doesn’t have a utility for this, since planetarium apps do it well and Method 1 works much better for me). Sky Safari Pro and SkEye even include crosshairs, which will come in handy.
STEP 2: Strap your phone to the flat surface of your wedge, or perpendicular to your polar scope if you don’t have a wedge. If you have your scope pointing at 90 degrees declination, you could even strap it to the lens cap. Again it is best if you can have a diy non-metallic extension to mount the phone on to avoid magnetic interference.
STEP 3: If you are on the North hemisphere use the alt/az adjustment knobs to center your planetarium view to the South celestial pole (and vice versa).
Method 4: Using “null” star alignment on a goto mount.
This method only works on the mounts tuned so that when doing star alignment, the adjustments required are only slight:
STEP 1: Set up your mount pointing roughly to the North and start a star alignment as you would do during the night.
STEP 2: Don’t do any adjustments, blindly accept the default positions of the alignment stars.
STEP 3: Use goto to point to the sun (some mounts may refuse for safety reasons – perhaps using coordinates will work for those). If this is not daytime polar alignment (night – you just didn’t have a line of sight to the polar star), goto a bright star instead.
STEP 4: Use ONLY the alt/az adjustment knobs to bring the intended target to your eyepiece.
Use your app and it works great for setting up my Celestron CGX during the day. I also have an older iOptron SkyTracker and use their app as well. I notice there is about a 1’ to 2’ difference between each app. Any ideas why?
The iOptron app is a bit off, where “a bit” last time I checked varied from non at all when Polaris was at cardinal points to over 30′. I don’t know why they can’t fix it (at least a couple of updates years ago listed reworked calculations under what’s new), they seem to manage to make great mounts, shouldn’t be that hard 🙂 Just use Polar Scope Align for your iOptron just to be on the safe side, there’s a help section about “accuracy” if you have doubts you can compare it to US Naval Office ephemerides, Cartes du Ciel etc…