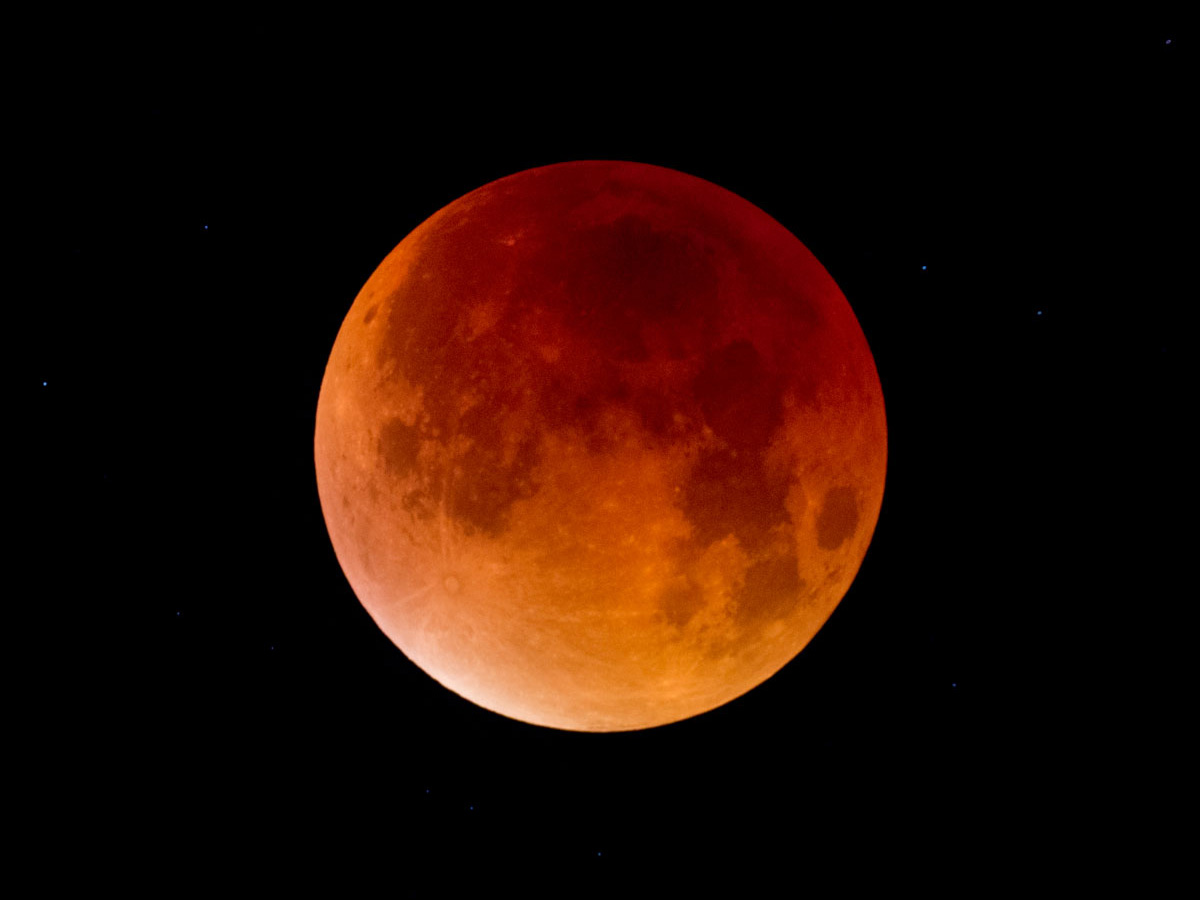
I finally had time to process my photos from my “Supermoon” lunar eclipse photo session at Salford Observatory. It was a very cold and humid night, 4 people showed up, 3 stayed until at least after the eclipse maximum, but it was the best lunar eclipse I’ve observed (large moon and very nice red color – due to rayleigh scattering of course). It was my first ever session for both my Skywatcher Equinox 80 ED refractor (on the iOptron ZEQ25) and the Canon 600D which was un-modded at the time. The reason I did not make an eclipse post earlier is because I wanted to make a nice time-lapse video, something that takes a little time. It covers the eclipse from the start to the maximum (2h 50m) later and I hope the result is pleasing (try full screen HD):
For more pics and the how and why of the session and the timelapse, read on.
Photos
While you will start a lunar eclipse session with ISO 400 or less and exposures at 1/1000s or so, near the eclipse maximum you will need to either go to the ISO 400 / 15 sec exposure route, or ramp up the ISO to something like 1600 where you might be OK with just 1 or 2 sec exposures. I chose the latter because I wanted a quick setup with not very precise polar alignment and also the ability to do many test exposures. I had an intervalometer shooting once every minute and between two auto-shots I could try out longer or shorter exposures for a different effect.
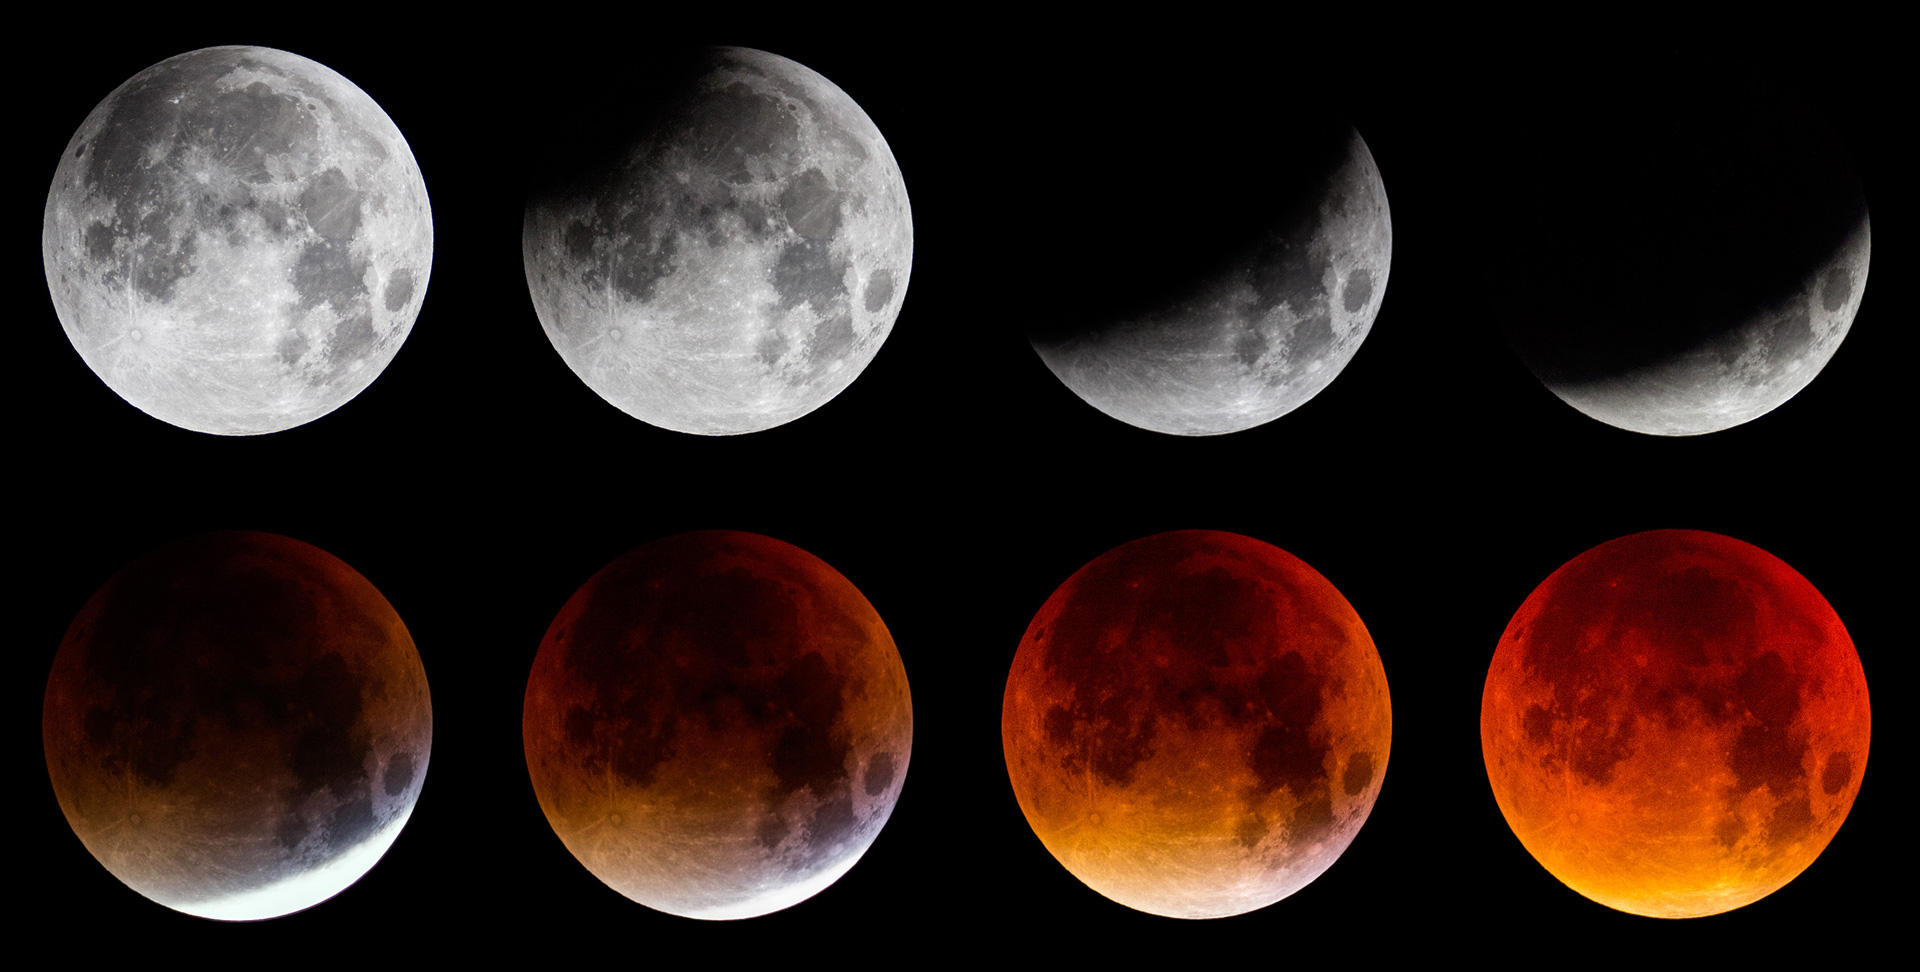
Here are a couple of example shots at 40 minutes before maximum and at maximum respectively:


You can see that my camera is a bit grainy at ISO 1600, which might seem like a drawback of going for short exposures. However, with the “magic” of stacking, we can combine multiple “grainy” short exposures for great results.
Stacking
You might be familiar with stacking of deep space photos on programs like DSS or stacking of planetary videos on Registax / Autostakkert. Due to the nature of lunar eclipse photography where you have only a handful of exposures for a specific phase of the eclipse, it is possible to stack manually using Photoshop. The process is simple, you add the second image as a layer on top of your first image. You switch the layer to blending mode “difference” to ensure perfect alignment, then switch back to “normal” blending mode with 50% opacity. The third image is added as a new layer on top of the other two and set at 100/3 = 33% opacity. The fourth at 100/4 = 25% opacity and so on (the formula is 100/n so the next values are 20%, 17%, 14% etc…) The above images as a stack of 5 exposures each are shown below:
To better understand the difference, a 100% crop between the single image and the stack of 5 exposures is shown below:
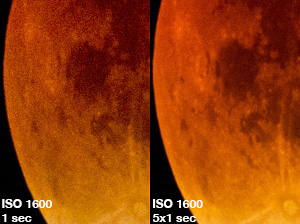
And this is a good reason to go with short exposures on high ISO. Even if you have devoted more time to your setup a spoiled 10-15 sec exposure at low ISO (bad tracking, vibration etc) means you lose the photo, which might not be good for something like at time-lapse. Short exposures are pretty hard to mess up, and even if you do have some that are not great, you can simply stack the rest. Note that dark frames do not help the quality of short lunar exposures, so after I tested to make sure I ended up not using them for the time-lapse to speed up my processing.
Time-lapse
As I had set up an intervalometer to shoot once every minute (and in between I would manually shoot), a time-lapse video is something I thought would be a good idea. It turns out it required quite a bit of manual work to get a result that I liked, mainly due to the special nature of the event, with a changing target and especially the wildly varying exposures from beginning to end.
Pre-processing
The first step was to pre-process all my RAW frames in photoshop. The phases of the eclipse were separated in groups so I could apply the same settings to all images that covered roughly the same phase of the eclipse. So, I would open all the RAW images of a group in Photoshop, apply the same “Camera Raw” settings to them, then record an action for the first which adjusted the colors and levels, did some cropping, resizing and filtering and saved into TIFF. The action was applied to all the images in the group and so on. Some sample processed phases of the eclipse:
Aligning
PIPP (Planetary Imaging PreProcessor) is an aptly named tool, useful for various aspects of planetary/lunar/solar imaging. I used it for two important tasks. First, it will help you align the bulk of your images. It will probably fail for some parts since there is no “eclipse” mode to compensate for the wildly changing moon in the final phase, but using the Solar/Lunar close-up mode (preferably separately for the partial and final phase) and assigning an Anchor Feature Box lower right corner of the moon (the last to go) will align most of the images:
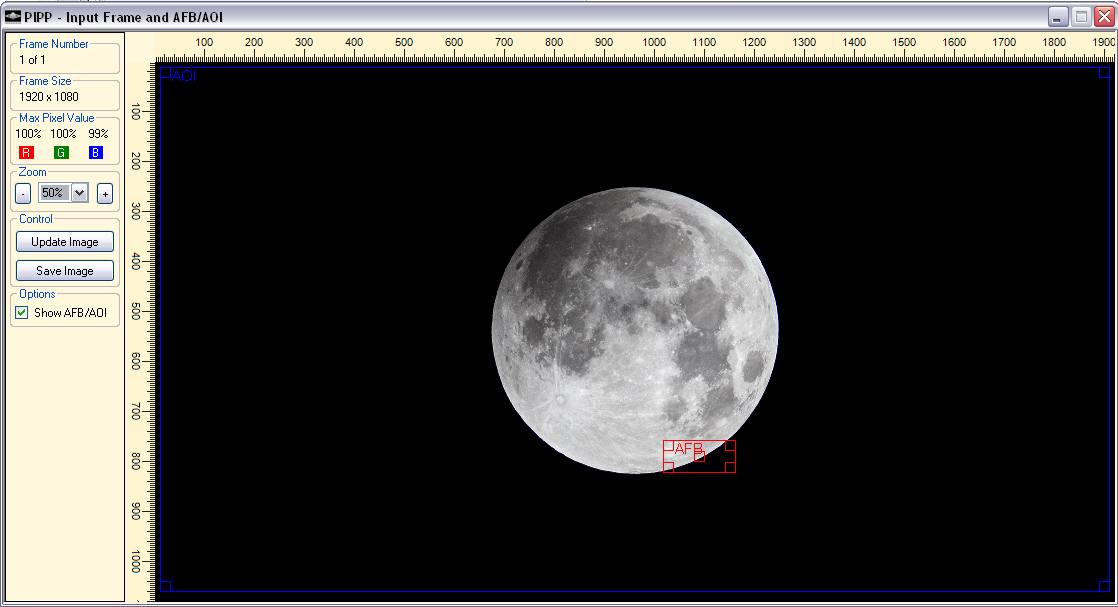
You can also do the cropping to the final size here if you wish by defining an Area Of Interest and selecting the crop to it. Make sure to use lossless output when making a PIPP pass, which is either TIFF images (if you need to correct the alignment of some parts of the eclipse, or do post-processing) or AVI lossless UT Video.
Assembling the time-lapse video
PIPP will also compile your finished images in a time-lapse video. You can set the frame rate depending on your source, for an eclipse with photos every minute or so, a setting of 2-4 fps should give you an adequate time-lapse speed/duration. I still set the AVI output to the ULRG codec (UT Video) in this final pass, since I do my final rendering outside PIPP.
I have also used Time Lapse Assembler in the past on a Mac. The drawback is that it expects JPEG input (with Photoshop you can quickly convert all your images by going to File->Scripts->Image Processor) and you don’t have much control on the final movie compression settings.
Smoothing video with Avisynth
If I had shot with a very high frequency, say every 5 or 10 seconds, I would choose a frame rate of 30 or so in PIPP and I’d be mostly done. However, if you don’t have a huge number of photos to compile (which, for an eclipse would mean a lot of work), then you end up with a 2-4 fps video which is not that satisfying. It is more like a quick slideshow… So I thought, what if you could increase the frame rate by interpolating the available frames to generate in-between frames? One automated way I found that can do it is using the Avisynth script InterFrame. You can use this 60FPS conversion guide* on how to set it up, however you should change the last line of the Avisynth script to something like this:
InterFrame(Cores=Cores, NewNum=30, Tuning="Smooth")
Where NewNum=30 is your target frame-rate (you can vary this per your wishes), and, more importantly, Tuning=”Smooth” will give you less artifacts when processing an eclipse.
* In case the guide ever disappears, here is a pdf print.